Movies (Page 160)
Browse 2,069 movies from the database, mentioned on Hacker News, ranked by rating or popularity.

The Hobbit: The Battle of the Five Armies
Bilbo and the Dwarves watch from the Lonely Mountain as the dragon Smaug sets Laketown ablaze. Bard breaks out of prison and kills Smaug with the black arrow. Smaug's falling body crushes the Master of Laketown and his cronies, who were escaping on a boat with the town's gold. Bard becomes the new leader of Laketown and guides its people to seek refuge in the ruins of Dale. Thorin, now possessing the vast treasure in the mountain, searches obsessively for the Arkenstone, which Bilbo had previously found but kept hidden. Upon hearing that Laketown survivors have fled to Dale, he orders the entrance of the Lonely Mountain sealed off. Meanwhile, Galadriel, Elrond, and Saruman arrive at Dol Guldur and free Gandalf, sending him to safety with Radagast. They battle and defeat the Nazgûl and then face a formless Sauron, whom Galadriel banishes to the East. Azog, marching on Erebor with his vast Orc army, sends his son Bolg to Mount Gundabad to summon their second army. Legolas and Tauriel witness the march of Bolg's army, bolstered by Orc berserkers and giant bats. Thranduil and an Elf army arrive in Dale to reclaim treasure held by Dwarf king Thrór. To avoid war, Bard attempts to negotiate with Thorin, asking him to share the gold previously promised to Laketown, but Thorin refuses. That night, Gandalf arrives to warn Bard and Thranduil of Azog's army, but Thranduil dismisses him. Bilbo sneaks the Arkenstone out of Erebor and gives it to Thranduil and Bard to trade for treasures and prevent war. The next morning, a combined army of Elves and Lake-town men approaches the Lonely Mountain, and Thranduil and Bard reveal that they have the Arkenstone. Thorin believes it to be a ruse, but Bilbo reveals the truth, at the same time reprimanding Thorin for his greed. Thorin nearly kills Bilbo but is stopped by Gandalf. Thorin's cousin, Dáin arrives with his Dwarf army, and a battle looms until Azog's forces arrive. As Dáin leads his forces to face the Orcs, Gandalf convinces Thranduil to join forces against Azog's army. Azog splits his army, sending some of his forces to attack Dale, so Bard and Lake-town army return to the city to defend it. Inside Erebor, Thorin, realising his greed and selfishness, regains his sanity and leads his company to join the battle. He rides with Dwalin, Fíli, and Kíli to Ravenhill to kill Azog. Meanwhile, Tauriel and Legolas arrive to warn the Dwarves of Bolg's arrival, and Bilbo volunteers to relay the news to Thorin, using his magic ring to move through the combat unseen. Azog kills Fíli as Bilbo and the other Dwarves are forced to watch. Bolg overpowers Tauriel and kills Kíli, who has come to her aid. Legolas battles Bolg and eventually kills him. The Great Eagles arrive with Radagast and Beorn, and the Orcs are finally defeated. In the climax, Thorin engages Azog in a duel and kills him, but is fatally wounded. Bilbo reconciles with the dying Thorin, while Tauriel mourns Kíli. Thranduil advises Legolas to seek out a ranger in the north who goes by the name Strider. Thorin's company settles back into Erebor with Dáin as their new king. Bilbo bids farewell to the company's remaining members and journeys home to the Shire with Gandalf. As the two part ways on the outskirts of the Shire, Gandalf admits his knowledge of Bilbo's magic ring and warns him of it, although Bilbo assures him that he had lost the ring. Bilbo returns to Bag End to find his belongings being auctioned off because he was presumed dead. He stops the sale and tidies up his home, revealing he still possesses the ring. Sixty years later, Bilbo happily receives a visit from Gandalf on his "111th" birthday.

The End of the Tour
Writer David Lipsky is dismayed to hear about the suicide of novelist David Foster Wallace in 2008. He had interviewed the author over a period of days twelve years earlier, following the publication of Wallace's novel Infinite Jest, which received critical praise and became an international bestseller, a touchstone for numerous readers. He listens to the recordings he made during their time together. The film returns to 1996, shortly after the book's release. Although initially skeptical of the high praise Wallace's book is receiving, Lipsky – a writer having only marginal success – is awestruck after reading it. He persuades his editor at Rolling Stone magazine to give him an assignment to interview Wallace during his book tour. The journalist travels to meet Wallace at his home on the outskirts of Bloomington-Normal, Illinois (near Illinois State University where the author teaches writing). Lipsky finds the young author unassuming and amiable, but indifferent to being interviewed. Wallace permits Lipsky to tape-record their conversations, with the proviso that Lipsky won't use any direct quotes which Wallace asks to have taken "off the record" five minutes later. Wallace opens up to Lipsky on a variety of subjects, ranging from dogs to television to fame and self-identity, but remains somewhat guarded. He tacitly admits to alcoholism, but offers few details of his experience. Lipsky's mention of Wallace's brief voluntary institutionalization under a suicide watch causes some friction between them. As their conversation continues late into the night, Wallace invites Lipsky to stay in his unused "guest room", rather than a motel. The room is dominated by stacks of his books. They resume the interview in the morning. Lipsky also accompanies Wallace for a few days to Minneapolis-Saint Paul, where Wallace has the final appearance of his book tour. There they meet two women friends of Wallace: Betsy, whom he knew in graduate school, and Julie, a literary critic; the men spend time with the women later that night and the next day at the Mall of America. Although Wallace and Lipsky generally get along well, Wallace becomes angry when he sees Lipsky flirting with Betsy. After their return to Wallace's home, tension increases when Lipsky asks the author about rumors of past heroin abuse. Wallace denies it, accusing Lipsky of looking for a stereotypical angle from which to write his article. As their time comes to an end, the two spend a morning together, mainly as new friends rather than as journalist and subject. Lipsky summons the nerve to give Wallace a copy of his own novel, and they agree to stay in touch. Twelve years later, Wallace dies by suicide in his house. The closing passage is set fourteen years later, when Lipsky is on his own book tour. He reads from his memoir, Although of Course You End Up Becoming Yourself (2010), based on their 1996 encounter. He recounts the road trip he had with Wallace, reflecting on ideas the two had discussed and how their conversations made Lipsky less lonely.

The Disaster Artist
In San Francisco in 1998, 19-year-old Greg Sestero befriends Tommy Wiseau in Jean Shelton 's acting class after Tommy gives a bizarre interpretation of a scene from A Streetcar Named Desire. Greg is impressed by Tommy's fearlessness, though Tommy also exhibits unusual habits and mannerisms; for instance, he can afford apartments in both San Francisco and Los Angeles, but refuses to discuss his personal life or the source of his wealth, and insists that he is from New Orleans despite his pronounced European accent. At Tommy's suggestion, the two move to Los Angeles to pursue acting careers. Greg signs with talent agent Iris Burton, regularly attends auditions, and starts dating a girl named Amber. Meanwhile, Tommy is constantly rejected by agencies, acting teachers, casting directors, and producers, and believes Amber is sabotaging his and Greg's friendship. As Greg's auditions begin to dry up, Tommy decides to make a film for them to star in. He writes the screenplay for The Room, a melodrama about a love triangle between banker Johnny (played by Tommy), his fiancée Lisa, and his best friend Mark (played by Greg, who is also given a line producer credit). Tommy insists on buying, rather than renting, all of the production equipment they need, and decides to shoot the film on 35 mm film and HD Digital simultaneously, another costly and unnecessary measure. Tommy hires Raphael Smadja as the cinematographer and Sandy Schklair as the director and script supervisor, and casts actress Juliette Danielle as Lisa. While production starts smoothly, Tommy's controlling behavior and lack of experience soon begin to cause problems. He forgets his lines, arrives late, and refuses to supply his crew with basic needs like drinking water and air conditioning, even when one of the actors suffers a heatstroke on set. The cast and crew are baffled by the film's nonsensical plot and Tommy's inexplicable directorial and acting choices. Tensions mount between the crew and Tommy when he refuses to film on a closed set and insults Juliette during a sex scene, during which he almost gets into a fight with Smadja. Tommy then angrily reveals that he has been watching the behind-the-scenes footage of the production and thus knows what the cast and crew have been saying about him behind his back, and that he has spent $5 million on the production, though he does not disclose where these funds came from. While The Room is still filming, Greg and Amber run into Bryan Cranston at a café. Cranston reveals that he is directing an upcoming episode of Malcolm in the Middle, the TV show he is on, and invites Greg to play a lumberjack character, noting his lumberjack-like facial hair. Greg begs Tommy to delay shooting of an upcoming scene in The Room where Mark shaves his beard (for no apparent purpose), but Tommy refuses. Greg begrudgingly finishes the film, relinquishing his opportunity to be on the show. On the last day of shooting, which is on location back in San Francisco, Greg lashes out at Tommy for his selfishness throughout their friendship and demands that Tommy finally reveal his age, birthplace, and source of income. Tommy refuses and Greg storms off, while a disheartened Tommy declares that filming is wrapped. By June 2003, Greg has broken up with Amber and started working in theater, and Tommy has finished work on The Room, which he invites Greg to the premiere of. Greg reluctantly agrees; the entire cast and crew also attend. As the film plays on the screen, the capacity audience at first reacts with bemused silence, then increasingly with laughter at Tommy's poor performance, script, and filmmaking techniques. A humiliated Tommy storms out of the theater, but Greg follows him and asserts that the audience's enthusiastic response is something to be proud of, reconciling their friendship. With renewed optimism, Tommy takes the stage as the film ends and expresses his appreciation of the warm reception for his "comedic" film. He invites Greg to join him, and the pair receive a standing ovation. In a post-credits scene, a man named Henry approaches Tommy at a party and invites him to hang out. Tommy declines, but recognizes Henry's familiar "New Orleans" accent.

The Empty Man
In 1995 in the Ura Valley, Bhutan, four friends—Greg, Fiona, Ruthie, and Paul—go hiking on a mountain. Paul hears a strange whistling and falls into a crevice. Greg finds him in an almost catatonic state, staring at a massive, ancient humanoid skeleton with inhuman features embedded in the cave wall. Paul warns Greg against touching him, or he will die. Ignoring the warning, Greg carries Paul out. The group takes refuge at an empty house as a snowstorm hits. The next day Ruthie is chased by a tall creature wearing robes, which disappears. That night, the paralyzed Paul whispers something into Ruthie's ear. The following morning, they wake up to find Paul sitting near the bridge they crossed yesterday. As Greg shouts at Paul, a dazed Ruthie stabs Greg and slices Fiona's throat, then pushes them off the cliff. She shares an entranced look with Paul before throwing herself off too. Paul helplessly watches, shedding a single tear. In Missouri 2018, former detective James Lasombra is grieving the deaths of his wife Allison and son Henry in a car crash a year prior. He is friends with his neighbor Nora, a widowed single mother. Nora's daughter Amanda runs away leaving a message in the bathroom that reads "The Empty Man made me do it". Searching her bedroom for clues, James discovers a flier from a group called the Pontifex Institute with the word tulpa written on the back. Amanda's friend Davara reveals that Amanda encouraged them to summon the Empty Man, a local legend. To summon him, one must find an empty bottle on a bridge, blow into it, then think of the Empty Man. The next day, Davara witnesses Amanda whispering into their friend Brandon's ear. James investigates the bridge and finds the empty bottle. He blows on it, goes underneath the bridge, and discovers the hanged bodies of Brandon and the rest of Amanda's friends with the same message found in the bathroom. Davara sees the Empty Man, who kills her with a pair of scissors. A brief flash shows Davara holding herself by the throat and stabbing herself with the scissors. The police rule her death a suicide. James researches the Pontifex Institute, discovering it is a cult that has beliefs originating from places like Bhutan and in tulpas. He believes he hears the Empty Man that night and is besieged by nightmares. He travels to the institute and sits in on a talk by cult leader Arthur Parsons. He is alarmed at the leader's references to the Empty Man, claiming him to be an entity that provides his followers with what they want as long as they do his bidding. James begins to think he sees the Empty Man. He follows cult members and investigates a cabin in the woods where he finds files on Amanda, her friends, Paul, and himself. He witnesses the cult performing a fire ritual but is spotted and pursued. He suspects that Amanda is now a member of the cult and informs Nora that she is not safe. He takes Nora to a hotel to hide. It is revealed that the pair were having an affair and he was with Nora when Allison and Henry died. Suffering from hallucinations, James kidnaps a cult member, Garrett, and asks him what is happening before brutally beating him. Garrett says a man in the hospital is the Empty Man's speaker. The man turns out to be Paul, who is regularly visited by cult members to get messages from the entity. James finds Amanda in Paul's hospital room. James calls Nora, but she does not know who he is. Amanda explains that Paul is dying from the strain of being the Empty Man, and that the cult needs a new vessel. She tells James that he is a tulpa, a new vessel for the being, and that his memories and relationships were fabricated by her and the cult to ensure the deity's connection through his pain and loss. The anger, grief, and fear in his life were key to allowing connection with the Empty Man. According to Amanda, James has only existed for a few days. James breaks down and finds himself in a limbo-like plane, where he is chased and caught with the being entering his body. He experiences flashbacks and distortions that show his memories wavering and distorting out of existence. Back in the hospital, James executes Paul. James finds himself surrounded by members of the hospital staff. They bow to him, now bound by the nameless entity.

The Electric State
In an alternate 1990, a war between humans and robots has left the world in disarray. With the help of Sentre CEO Ethan Skate, who developed Neurocaster technology that allowed humans to upload their minds into drone robots, humanity managed to win the war, while robots were banished to the Exclusion Zone. However, the success of this technology meant many people opted to live their virtual lives in a semi-vegetative state while drones did most of the work. In 1994, teenager Michelle lives with her deadbeat foster dad Ted. Years earlier, she was involved in a car crash along with her family, in which her parents and brother reportedly perished, and has since lived with a succession of foster families. Michelle is also having trouble at school due to her refusal to use Neurocaster technology to participate in virtual classes. One day, the sentient robot Cosmo – a robot character of the cartoon of the same name which Michelle's declared-deceased younger brother Christopher, who was a child prodigy, watched – finds Michelle. He is only able to communicate using gestures and a limited set of pre-recorded words, but manages to convince her that he is controlled by Christopher. Michelle and Cosmo set out across a dystopian landscape to find him by first finding Dr. Clark Amherst, the doctor who confirmed Christopher's death. Along the way, they encounter Keats, a veteran, and Herman, a sentient robot who is able to take on multiple forms. Together, they eventually meet up with a band of robots in the Exclusion Zone led by Mr. Peanut. There, they find Dr. Amherst and his robot friend P.C., who explains that Sentre found Christopher in a seemingly permanent vegetative state after the accident and discovered that they could create the Neurocaster technology by exploiting Christopher's exceptional intellect and integrating his consciousness into the Neurocaster; this technology was instrumental in giving humans an advantage in the war against the robots. However, after Christopher unexpectedly came out of his coma thirteen months later, a remorseful Amherst built a way for his mind to escape. Sentre drones, under the command of Colonel Bradbury, attack and recapture Christopher, killing Amherst and destroying the robots' home. Determined to rescue her brother, Michelle and P.C. infiltrate Sentre's headquarters with the help of Keats and Herman, while the other robots wage war with Skate's drone army. Disgusted with Skate's actions, Bradbury defects and helps Peanut to confront Skate while Michelle discovers Christopher in a comatose state, his consciousness trapped within the Neurocaster system. In the virtual realm, Christopher explains to Michelle that his consciousness is powering Skate's drones, and expresses his desire to be freed from his exploited existence. Michelle disconnects him, resulting in his physical body dying. Christopher's death triggers the shutdown of Sentre's drone operations. In the aftermath, Skate is arrested and the world begins to rebuild from the devastation wrought by the war and corporate greed. Michelle then broadcasts to the world exposing how the Neurocaster technology has affected people's lives and inviting those who wish to live in peace to the Exclusion Zone. Cosmo's body is dumped in a junkyard, but he is shown rising up, suggesting that a part of Christopher's consciousness may still reside within the robot.
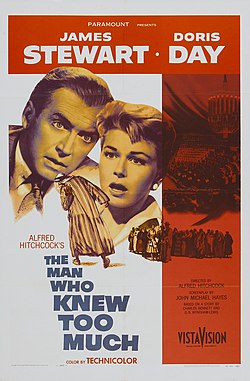
The Man Who Knew Too Much
An American family – Dr. Ben McKenna, his wife, popular singer Jo Conway, and their son Hank – are vacationing in French Morocco. Traveling from Casablanca to Marrakesh, they meet Frenchman Louis Bernard. He seems friendly, but Jo is suspicious of his many questions and evasive answers. Bernard offers to take the McKennas to dinner, but cancels when a suspicious-looking man knocks at the McKennas' hotel-room door. At a restaurant, the McKennas meet friendly English couple Lucy and Edward Drayton. The McKennas are surprised to see Bernard arrive and sit elsewhere, apparently ignoring them. The next day, visiting the local marketplace with the Draytons, the McKennas see a man chased by police. After being stabbed in the back, the man approaches Ben, who discovers he is Bernard in disguise. The dying Bernard whispers that a foreign statesman will be assassinated in London and that Ben must tell the authorities about "Ambrose Chappell". Lucy returns Hank to the hotel while Ben, Jo and Edward go to a police station for questioning about Bernard's death. An officer explains that Bernard was a French Intelligence agent. Ben receives a phone call at the police station; Hank has been kidnapped but will not be harmed if the McKennas say nothing to the police about Bernard's warning. Knowing Hank was left in Lucy's care, Ben dispatches Edward to locate him. When Ben and Jo return to the hotel, they discover Edward checked out. Ben realizes the Draytons are the couple Bernard was looking for and are involved in Hank's abduction. When he learns the Draytons are from London, he decides he and Jo should go there and try to find them through Ambrose Chappell. In London, Scotland Yard 's Inspector Buchanan tells Jo and Ben that Bernard was in Morocco to uncover an assassination plot; they are instructed to contact him if they hear from the kidnappers. Leaving Jo's friends in their hotel suite, the McKennas search for a person named Ambrose Chappell. Jo realizes that "Ambrose Chapel" is a place, and the McKennas arrive at the chapel to find Edward leading a service. Jo leaves the chapel to call the police. After Edward sends his congregation home, Ben confronts him and is knocked out and locked inside. Jo arrives with the police, but they cannot enter without a warrant. Jo learns that Buchanan has gone to a concert at the Royal Albert Hall, and asks the police to take her there. Once the police and Jo leave, the Draytons take Hank to a foreign embassy. In the Royal Albert Hall lobby, Jo sees the man who came to her door in Marrakesh. When he threatens to harm Hank if she interferes, she realizes he is the assassin sent to kill the foreign prime minister. Ben escapes the chapel through its bell tower and reaches the Royal Albert Hall, where Jo points out the assassin. Ben searches the balcony boxes for the killer, who is waiting for a cymbal crash to mask his gunshot. Just before the cymbals crash, Jo screams and the assassin misses his mark, only wounding his target. Ben struggles with the would-be killer, who falls to his death. Concluding that Hank is likely to be at the embassy, but that it is sovereign and exempt from an investigation, the McKennas secure an invitation from the grateful prime minister. The ambassador organized the plot to kill the prime minister, and blames the failed attempt on the Draytons. Knowing that Hank can testify against them, he orders the Draytons to kill the boy. The prime minister asks Jo to sing. She loudly performs " Que Sera, Sera ", so that Hank will hear her. Lucy, who is guarding Hank while Edward prepares to murder him, is distressed at the prospect of killing a child, so she encourages the boy to whistle along with the song. Ben finds Hank. Edward tries escaping with them at gunpoint, but when Ben hits him, he falls down the stairs to his death. The McKennas return to their hotel suite. Ben explains to Jo's now-sleeping friends, "I'm sorry we were gone so long, but we had to go over and pick up Hank."

The Long, Hot Summer
Ben Quick is on trial for barn-burning, but since there is no evidence the judge just orders him to leave town. Ben hitches a ride to Frenchman's Bend, Mississippi, with two young women in a convertible, Clara Varner and her sister-in-law Eula. Clara's father, Will Varner, is the domineering owner of most of the town. Will is away, but his only son, Eula's husband Jody, agrees to let Ben become a sharecropper on a vacant farm. When Will returns from a stay in the hospital, he is furious at Jody for hiring a notorious "barn burner", but soon begins to see in Ben a younger version of himself and comes to admire his ruthlessness and ambition, qualities that Jody lacks. Will is also disappointed that his 23-year-old daughter, Clara, has not married the man she has been seeing for five or six years: Alan Stewart, a genteel Southern "blue blood" and a mama's boy. Will therefore schemes to push his daughter and Ben together. However, she is openly hostile to the crude upstart. Will is determined to have his bloodline go on, so he offers to make Ben wealthy if he marries Clara. Meanwhile, Minnie Littlejohn, Will's longtime mistress, is dissatisfied with their arrangement and wants to get married. Jody becomes increasingly frustrated, seeing his position being undermined, and his marriage falters. After Ben sells some worthless wild horses for Will, he is rewarded with the job of clerk in Will's general store alongside Jody. Will even invites him to live in the family mansion. Jody pulls a gun on Ben and threatens to kill him. Ben talks his way out by telling Jody about buried Civil War -era coins he has supposedly found on a property that Will gave him, a down payment to seal their bargain over Clara. Jody starts digging and finds a bag of coins. He is elated, thinking he has finally escaped his father's domination; he buys the land from Ben. Late that night, Will finds his son, still digging. After examining a coin, Will notices that it was minted in 1910. Jody is shattered. Ben aggressively pursues Clara. She finally asks Alan what his intentions are, and he replies that he only wants to "help" her. Misinterpreting what Clara tells him, Will goes to congratulate Alan and his mother on the impending marriage, but is infuriated when he learns the truth. He returns home. A defeated Jody finds his father alone in their barn. Jody bolts the entrance and sets the barn on fire, but he cannot go through with it and releases Will. Will is touched by Jody's change of heart and calls him his "strong right arm." Men from town assume Ben is the culprit and intend to lynch him, but Clara rescues him from the mob and drives him back to the plantation. Will defuses the situation by telling the mob he accidentally started the fire himself. Ben confesses to Clara that his father was a barn-burner, committing arson when offended, and that he has been falsely dogged by such accusations because of his father. Ben tells her he is leaving town, but Clara makes it clear she has fallen in love with him. Will is so pleased with the success of his scheme, he declares he may decide to live forever.
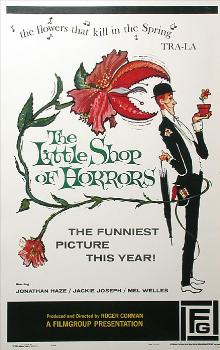
The Little Shop of Horrors
Florist shop owner Gravis Mushnick has two employees, Audrey Fulquard and Seymour Krelboined. Located on skid row, Mushnick's rundown shop gets little business. When Seymour fouls up a floral arrangement for dentist Dr. Farb, Mushnick fires him. Hoping to change his mind, Seymour talks about a plant he has grown from seeds he got from a "Japanese gardener over on Central Avenue". Seymour names the plant "Audrey Jr.", which delights Audrey. However, when finally shown the plant, Mushnick is unimpressed. Seymour suggests that Audrey Jr.'s uniqueness might attract people to see it, and Mushnick gives him one week to revive the plant. The usual plant food does not nourish it, but when Seymour accidentally pricks his finger, he discovers that the plant craves blood. Fed on Seymour's blood, Audrey Jr. begins to grow. The shop's revenues increase when customers are lured in to see the plant. Mushnick tells Seymour to refer to him as "Dad" and calls Seymour his son in front of a customer. The plant develops the ability to speak and demands that Seymour feed it. Now anemic, Seymour walks along the railroad track. Throwing a rock to vent his frustration, he inadvertently knocks out a drunken man who falls on the track and is run over by a train. He tries to get rid of the body by burying it in a yard but is nearly caught each time. Guilt-ridden, Seymour decides to feed the mutilated body parts to Audrey Jr. Meanwhile, Mushnick returns to the shop to get cash and secretly observes Seymour feeding the plant. Mushnick considers telling the police but hesitates after seeing the line of customers at his shop the next day. Seymour eventually arrives too, suffering from a toothache. Mushnick confronts him about Audrey Jr.'s eating habits without explicitly revealing what he knows about the plant. Seymour grows increasingly distressed as he realizes that Mushnick knows the truth. After finishing his rant, Mushnick sends Seymour to Farb, who wants to kill him and get even for his ruined flowers. Defending himself, Seymour kills Farb. Although horrified, Seymour feeds Farb's body to Audrey Jr. The disappearances of the two men attract the attention of Sergeant Joe Fink and his assistant Officer Frank Stoolie. Audrey Jr. grows several feet tall and is budding. A representative of the Society of Silent Flower Observers of Southern California announces that Seymour will receive a trophy and that she will return to the shop when the plant's buds open. While Seymour and Audrey go on a date, Mushnick stays at the shop to see that Audrey Jr. harms no one else. While tending to his shop, Mushnick finds himself at the mercy of Kloy Haddock, a robber who pretended to be a customer earlier that day. Haddock believes that the huge crowds he observed at the shop indicate the presence of a lot of money. Mushnick tricks Haddock into thinking that the money is where Audrey Jr. is kept. The plant eats Haddock after Mushnick maneuvers him next to it. When forced to damage his relationship with Audrey to keep her from discovering Audrey Jr.'s nature, Seymour confronts the plant, planning to no longer do its bidding. The plant then hypnotizes Seymour and commands him to bring it more food. He wanders the night streets and knocks out a prostitute, whom he takes to Audrey Jr. Lacking clues about the disappearances, Fink and Stoolie attend a sunset celebration at the shop during which Seymour is to be presented with the trophy and Audrey Jr.'s buds are expected to bloom. As the attendees watch, four buds open; inside each flower is the face of one of Audrey Jr.'s victims. Fink and Stoolie realize that Seymour is the murderer. Seymour flees from the shop with the officers in pursuit. He manages to lose them and make his way back to the now-empty shop, where he blames Audrey Jr. for ruining his life. The plant instead asks to be fed. Seymour grabs a kitchen knife and climbs into Audrey Jr.'s maw with the intention of killing it. Later that evening, Audrey Jr. begins to wither and die. One final bloom opens to reveal Seymour's face, who shouts "I didn't mean it!" Before Wilting.

The Love Bug
Jim Douglas, once a prominent race car driver, is now relegated to participating in demolition derbies. Residing in a converted firehouse overlooking San Francisco Bay, Jim lives with his friend Tennessee Steinmetz, an eccentric mechanic and sculptor whose artistic creations repurpose discarded automobile components. Jim’s fortunes shift when he visits a European car dealership, where he encounters Carole Bennett, a mechanic and sales associate, as well as Peter Thorndyke, the British proprietor of the establishment. During this visit, Jim notices a peculiar Volkswagen Beetle —a vehicle Thorndyke openly abuses after it is returned to the showroom under mysterious circumstances. Lacking the financial means to procure a vehicle, Jim departs, only to find that the Beetle follows him home. This leads to a police intervention on charges of grand theft, forcing Jim to reluctantly agree to a lease-purchase arrangement for the car. Initially, Jim is frustrated with the Beetle, whose idiosyncratic behaviour includes avoiding highways and orchestrating encounters with Carole, suspecting Thorndyke of duping him with a malfunctioning vehicle. Tennessee discerns that the car possesses sentience although Jim sceptically dismisses Tennessee's claims. Endearing himself to the Beetle, Tennessee christens the car "Herbie". Jim decides to enter Herbie into racing, giving the car racing stripes and adding the number '53'. In their debut race, Herbie delivers an unexpected victory, much to Thorndyke's surprise and Carole's delight. Thorndyke then offers the clear the payments in exchange to sell Herbie back to him. Jim is forced to compete directly with Thorndyke at Riverside, Herbie scores another impressive victory, overtaking his rival at the finish line. Jim, Tennessee, and Herbie becoming the talk of the California racing circuit, while once-champion Thorndyke suffers increasingly humiliating defeats. Desperate to discover the secret of Herbie's success, Thorndyke, on the eve of another important race, convinces Carole to take Jim for a ride in the best car in the showroom (an Apollo GT), then sneaks into his rival's house, gets Tennessee drunk on his own Irish coffee, and sabotages Herbie's performance in the race by pouring it into Herbie's gas tank. Disillusioned, Jim decides to replace Herbie with a new Lamborghini, a decision that alienates Carole who had just quit her promising job alongside Thorndyke (learning of his sabotage scheme), and Tennessee. Feeling betrayed, Herbie reacts by vandalizing the Lamborghini and fleeing. After narrowly escaping being torn apart in Thorndyke's workshop, his escapades culminate in an attempt to throw himself from the Golden Gate Bridge, prompting Jim to intervene. At the police station, Tang Wu, a racing enthusiast and local businessman whose property Herbie also damaged, agrees to an offer from Jim to drop charges in exchange for ownership of Herbie on condition that Jim and Tennessee may race Herbie in the prestigious El Dorado Road race, with the agreement that if Jim wins the race, Mr. Wu will sell Herbie back to him for one dollar. The El Dorado race, a two-day event traversing the Sierra Nevada, becomes the stage for Thorndyke's underhanded tactics. Despite these obstacles, Jim, Carole, and Tennessee persevere, although the first leg of the race leaves Herbie in a battered state, limping across the finish line using a makeshift wagon wheel. Overnight, Herbie refuses to start, and Jim admits to Mr. Wu that Herbie is in no condition to continue the race. Thorndyke suddenly appears, revealing that he made a separate bet with Mr. Wu that should Herbie drop out of the race, Thorndyke would take possession of Herbie and have him crushed. After Thorndyke assaults Jim, Herbie restarts, chasing Thorndyke away. On the second leg, Herbie overcomes numerous challenges to close the gap on Thorndyke and take the lead heading into the final stages of the race. As they near the finish line, Herbie splits in two due to mechanical strain, his rear half, carrying Tennessee and the engine, crossing the finish line first, while his front half, with Jim and Carole aboard, follows closely, securing both first and third place. Wu assumes control of Thorndyke's dealership, appoints Tennessee as his assistant, and relegates Thorndyke to the mechanics' workshop alongside his accomplice Havershaw. Rebuilt, Herbie serves as the wedding vehicle for Jim and Carole's departure, whisking the newlyweds away on their honeymoon.

The Kremlin Letter
In late 1969, U.S. Naval Intelligence officer Charles Rone is contacted by "The Highwayman", a veteran spy and member of a freelance espionage ring that sells information to the highest bidder. The Highwayman recruits Rone for an intelligence operation, along with Janis, "The Whore", a drug dealer and panderer; "The Warlock", a culturally sophisticated homosexual; and B.A., a thief. The group must retrieve a letter, written without proper authorization, that promises United States aid to the Soviet Union in destroying Chinese atomic weapons plants. The letter was solicited on behalf of a high-level Soviet official by a man named Dmitri Polyakov. Polyakov had previously been selling Soviet secrets to the U.S. that he had obtained from the high-level official. Upon learning about the letter, U.S. and British authorities arranged to buy it back from Polyakov. However, Polyakov later committed suicide after being apprehended by Soviet counterintelligence, under the direction of Colonel Yakov Kosnov. The group blackmails Captain Potkin, the head of Soviet counterintelligence in the U.S., threatening his family to force him to allow them the use of his vacant apartment in Moscow. Once they arrive in the USSR, the terminally ill Highwayman sacrifices his life, attempting to divert the attention of Soviet counterintelligence away from his team. To ascertain the identity of Polyakov's contact, Janis enters a partnership with a brothel operator, who mentions a Chinese agent known as "The Kitai" as a possible source for names of officials and others to whom he can sell heroin, with which Janis already plans to keep the prostitutes addicted. Meanwhile, the Warlock integrates himself into a community of intellectual homosexuals, starting an affair with a university professor. One of the professor's students was Polyakov's former lover. The student says that Polyakov had a relationship with Vladimir Bresnavitch of the Central Committee. Years before, Bresnavitch sought to oust Kosnov from his job, in favor of Robert Sturdevant, a primary operator in The Highwayman's old group. Prior to that time, Kosnov and Sturdevant had been friendly, with each one trusting the other to allow his agents to operate in the other's territory. However, with the pressure from Bresnavitch, Kosnov decided that he had to do "something spectacular" to keep his job. He betrayed Sturdevant's trust and captured his agents, earning the enmity of Sturdevant himself. Sturdevant eventually disappeared and presumably committed suicide. Bresnavitch had used Polyakov to fence stolen art works in Paris, so Ward, an old partner of the Highwayman and a member of Rone's current group, decides to go there in search of leads. On the day of his return, Potkin reaches the Soviet Union and informs Bresnavitch about Rone's operation. Janis, B.A. and Ward are apprehended, while The Warlock commits suicide before being captured. Rone escapes and tries visiting the Kitai to arrange re-purchase of the letter. However, the Kitai responds by trying to kill Rone, who determines that the Chinese have the letter. Rone then turns to Kosnov's wife Erika Beck, with whom he has been having an affair. Rone eventually realizes that Bresnavitch orchestrated the raid without the knowledge of Soviet counterintelligence, an indicator that he was Polyakov's traitorous Soviet official contact. Rone promises to help Erika escape to the West. She later reports that B.A. has taken poison and is expected to die. Rone threatens to expose Bresnavitch unless Ward is released. Bresnavitch agrees, and Rone and Ward then arrange to leave the next day. Disapproving of Rone's plans to aid Erika, Ward kills her. Ward then approaches Kosnov. He begins listing the names of agents betrayed by Kosnov, says that the time has come for retribution and shoots Kosnov in the kneecap. Kosnov then seems to recognize Ward, who closes in on him. Kosnov soon begins screaming. While heading for a plane to leave the country, Rone shares with Ward his conclusions that Ward is actually Sturdevant and intends to stay, having made a deal with Bresnavitch to take over as the head of Soviet counterintelligence. Ward then reveals that B.A. is alive. He offers to release B.A. in exchange for a favor, handing Rone a note that reads, "Kill Potkin's wife and daughters or I kill the girl."
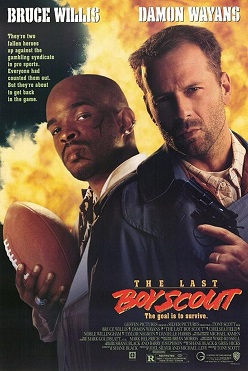
The Last Boy Scout
During halftime at a football game, Los Angeles Stallions running back Billy Cole receives a call from Milo, a man who warns him to win the game or he will be killed. Cole ingests PCP and in a drug-induced rage, carries a gun onto the field, shooting three opposing players to reach the end zone before shooting himself in the head. Meanwhile, private investigator Joe Hallenbeck, a disgraced former Secret Service agent who was once a national hero for saving the President from an assassination attempt, discovers that his wife Sarah is having an affair with his best friend and business partner, Mike Matthews. After a confrontation, Mike gives Joe an assignment to act as bodyguard for a stripper named Cory. Mike is then killed by a car bomb outside Joe's house. That night at a strip club, Joe is approached by Cory's boyfriend, former Stallions quarterback Jimmy Dix, who was banned from the league on gambling charges and alleged drug abuse. While Cory and Jimmy exchange conversations, Joe waits outdoors and is eventually knocked unconscious by a team of hitmen. Jimmy and Cory leave the bar in separate cars while Joe overpowers the hitman left to dispatch him. When Cory is struck from behind and stops to confront the other driver, she is killed by the hitmen. Joe eliminates two of them as the other one retreats and Jimmy is saved. The pair are interrogated by lieutenant Benjamin Bessalo, and he grows dubious of Joe's behavior. Acting on a hunch at Cory's apartment, Jimmy and Joe find a taped phone conversation between Senator Calvin Baynard, who leads a congressional investigation into sports gambling, and Stallions owner Sheldon Marcone. When Joe was in the Secret Service, he witnessed Baynard torturing a woman in a hotel room and assaulted the senator to liberate her. Baynard retaliated by having Joe fired for refusing to cover up the incident. When the tape is ruined in Joe's faulty car stereo, Jimmy realizes that Cory tried using the tape against Marcone to reinstate Jimmy on the team, prompting Marcone to send the hitmen. Joe saves Jimmy from a second car bomb, and tricks two hitmen into blowing themselves up. However, the explosion destroys the remaining evidence. At Joe's house, Jimmy attempts to use cocaine in the bathroom. However, Joe catches Jimmy and kicks him out. As Jimmy leaves, Joe's daughter Darian asks him to sign a football trading card. She states that Joe was a fan of Jimmy's and never watched another game after he was excluded from the league. Learning of Mike's affair with Sarah, the police assume that Joe killed him and move to make an arrest. Milo, Marcone's top henchman, captures Joe first and shoots detective McClusky with Joe's gun. Marcone has been purchasing senate votes to legalize sports gambling, but Baynard tried to blackmail Marcone for $6 million. Aware of Joe's history with Baynard, Marcone explains it would be cheaper to kill the senator and frame Joe for the murder. Joe is taken to a wooded area and forced to hand a briefcase with money to Baynard's bodyguards, and Marcone's men surreptitiously switch it with a briefcase containing a bomb. Joe is rescued by Jimmy and Darian, and acquires both briefcases after running the bodyguards and Milo off the road. However, Milo survives and while Darian is left to wait for the police, she is abducted by Milo. Heading to the stadium to rescue Darian, Joe and Jimmy are captured and escorted to Marcone's office. Jimmy creates a diversion, allowing them to fight their way free. Realizing that Milo plans to shoot Baynard, Joe goes after Milo while sending Jimmy to warn the senator. Grabbing the game ball, Jimmy throws it at Baynard, knocking him down just as Milo starts to open fire. Joe pushes Milo to the edge of the stadium light platform, where SWAT officers shoot him before he falls into the moving rotor blades of a police helicopter. The briefcase of money is recovered and Marcone, having escaped with the rigged briefcase, is killed when he opens it at his estate. The next day, Joe and Sarah reconcile, and Joe and Jimmy decide to become partners.

The Lion King
In the Pride Lands, a pride of lions rules over the kingdom from Pride Rock. King Mufasa and Queen Sarabi 's newborn son, Simba, is presented to the gathered animals by Rafiki, the mandrill who serves as the kingdom's shaman and advisor. Mufasa's younger brother, Scar, covets the throne and plots to eliminate Mufasa and Simba so that he may become king. When Simba grows into a young cub, Mufasa shows him the Pride Lands and forbids him to explore beyond its borders. Mufasa explains to Simba the responsibilities of kingship and the "circle of life," which connects all living things. Scar manipulates Simba into exploring an elephants' graveyard beyond the Pride Lands. There, Simba and his best friend, Nala, are chased by three spotted hyenas named Shenzi, Banzai, and Ed. Mufasa is alerted by his majordomo, the hornbill Zazu, and rescues the cubs. Though disappointed in Simba for disobeying him and endangering himself and Nala, Mufasa forgives him. He explains that the great kings of the past watch over them from the night sky, from which he will one day watch over Simba. Scar visits the hyenas and convinces them to help him kill Mufasa and Simba in exchange for hunting rights in the Pride Lands. Scar lures Simba into a gorge and signals the hyenas to drive a large herd of wildebeest into a stampede to trample him. He then alerts Mufasa, who saves Simba and tries to escape the gorge, but Scar betrays him by throwing him into the stampede to his death. Scar then deceives Simba into believing that Mufasa's death was his fault and tells him to leave the kingdom and never return. He orders the hyenas to kill Simba, but Simba escapes. Unaware of Simba's survival, Scar tells the pride that the stampede killed both Mufasa and Simba, and steps forward as the new king, allowing the hyenas into the Pride Lands. Simba collapses in a desert but is rescued by two outcasts, a meerkat and a warthog named Timon and Pumbaa. Simba grows up with his two new friends in their oasis, living a carefree life under their motto " hakuna matata " ("no worries" in Swahili). Years later, an adult Simba rescues Timon and Pumbaa from a hungry lioness, who is revealed to be Nala. Simba and Nala fall in love, and she urges him to return home, telling him that the Pride Lands have become drought -stricken under Scar's reign. Still feeling guilty over Mufasa's death, Simba refuses and leaves angrily. He encounters Rafiki, who tells Simba that Mufasa's spirit lives on in him. Simba is visited by the spirit of Mufasa in the night sky, who tells him that he must take his place as king. After Rafiki advises him to learn from the past instead of running from it, Simba decides to return to the Pride Lands. Aided by his friends, Simba sneaks past the hyenas at Pride Rock and confronts Scar, who shames Simba over his supposed role in Mufasa's death. Scar then reveals to Simba that he killed Mufasa. Enraged, Simba retaliates and forces Scar to confess the truth to the pride. A battle ensues between Simba and his allies and the hyenas. Scar attempts to escape but is cornered by Simba at a ledge near the top of Pride Rock. Scar begs for mercy and attempts to deceive Simba by blaming his actions on the hyenas. Simba spares Scar's life, but orders him to leave the Pride Lands forever. Scar refuses and attacks Simba. Following a brief battle, Simba throws Scar off the ledge. Scar survives the fall, but the hyenas, who overheard him betraying them, attack and maul him to death. With Scar and the hyenas gone, Simba takes his place as king, and Nala becomes his queen. With the Pride Lands restored, Rafiki presents Simba and Nala's newborn cub to the assembled animals, thus continuing the circle of life.