Movies (Page 110)
Browse 2,069 movies from the database, mentioned on Hacker News, ranked by rating or popularity.

The Long, Hot Summer
Ben Quick is on trial for barn-burning, but since there is no evidence the judge just orders him to leave town. Ben hitches a ride to Frenchman's Bend, Mississippi, with two young women in a convertible, Clara Varner and her sister-in-law Eula. Clara's father, Will Varner, is the domineering owner of most of the town. Will is away, but his only son, Eula's husband Jody, agrees to let Ben become a sharecropper on a vacant farm. When Will returns from a stay in the hospital, he is furious at Jody for hiring a notorious "barn burner", but soon begins to see in Ben a younger version of himself and comes to admire his ruthlessness and ambition, qualities that Jody lacks. Will is also disappointed that his 23-year-old daughter, Clara, has not married the man she has been seeing for five or six years: Alan Stewart, a genteel Southern "blue blood" and a mama's boy. Will therefore schemes to push his daughter and Ben together. However, she is openly hostile to the crude upstart. Will is determined to have his bloodline go on, so he offers to make Ben wealthy if he marries Clara. Meanwhile, Minnie Littlejohn, Will's longtime mistress, is dissatisfied with their arrangement and wants to get married. Jody becomes increasingly frustrated, seeing his position being undermined, and his marriage falters. After Ben sells some worthless wild horses for Will, he is rewarded with the job of clerk in Will's general store alongside Jody. Will even invites him to live in the family mansion. Jody pulls a gun on Ben and threatens to kill him. Ben talks his way out by telling Jody about buried Civil War -era coins he has supposedly found on a property that Will gave him, a down payment to seal their bargain over Clara. Jody starts digging and finds a bag of coins. He is elated, thinking he has finally escaped his father's domination; he buys the land from Ben. Late that night, Will finds his son, still digging. After examining a coin, Will notices that it was minted in 1910. Jody is shattered. Ben aggressively pursues Clara. She finally asks Alan what his intentions are, and he replies that he only wants to "help" her. Misinterpreting what Clara tells him, Will goes to congratulate Alan and his mother on the impending marriage, but is infuriated when he learns the truth. He returns home. A defeated Jody finds his father alone in their barn. Jody bolts the entrance and sets the barn on fire, but he cannot go through with it and releases Will. Will is touched by Jody's change of heart and calls him his "strong right arm." Men from town assume Ben is the culprit and intend to lynch him, but Clara rescues him from the mob and drives him back to the plantation. Will defuses the situation by telling the mob he accidentally started the fire himself. Ben confesses to Clara that his father was a barn-burner, committing arson when offended, and that he has been falsely dogged by such accusations because of his father. Ben tells her he is leaving town, but Clara makes it clear she has fallen in love with him. Will is so pleased with the success of his scheme, he declares he may decide to live forever.
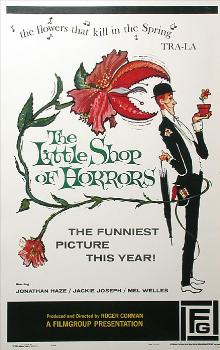
The Little Shop of Horrors
Florist shop owner Gravis Mushnick has two employees, Audrey Fulquard and Seymour Krelboined. Located on skid row, Mushnick's rundown shop gets little business. When Seymour fouls up a floral arrangement for dentist Dr. Farb, Mushnick fires him. Hoping to change his mind, Seymour talks about a plant he has grown from seeds he got from a "Japanese gardener over on Central Avenue". Seymour names the plant "Audrey Jr.", which delights Audrey. However, when finally shown the plant, Mushnick is unimpressed. Seymour suggests that Audrey Jr.'s uniqueness might attract people to see it, and Mushnick gives him one week to revive the plant. The usual plant food does not nourish it, but when Seymour accidentally pricks his finger, he discovers that the plant craves blood. Fed on Seymour's blood, Audrey Jr. begins to grow. The shop's revenues increase when customers are lured in to see the plant. Mushnick tells Seymour to refer to him as "Dad" and calls Seymour his son in front of a customer. The plant develops the ability to speak and demands that Seymour feed it. Now anemic, Seymour walks along the railroad track. Throwing a rock to vent his frustration, he inadvertently knocks out a drunken man who falls on the track and is run over by a train. He tries to get rid of the body by burying it in a yard but is nearly caught each time. Guilt-ridden, Seymour decides to feed the mutilated body parts to Audrey Jr. Meanwhile, Mushnick returns to the shop to get cash and secretly observes Seymour feeding the plant. Mushnick considers telling the police but hesitates after seeing the line of customers at his shop the next day. Seymour eventually arrives too, suffering from a toothache. Mushnick confronts him about Audrey Jr.'s eating habits without explicitly revealing what he knows about the plant. Seymour grows increasingly distressed as he realizes that Mushnick knows the truth. After finishing his rant, Mushnick sends Seymour to Farb, who wants to kill him and get even for his ruined flowers. Defending himself, Seymour kills Farb. Although horrified, Seymour feeds Farb's body to Audrey Jr. The disappearances of the two men attract the attention of Sergeant Joe Fink and his assistant Officer Frank Stoolie. Audrey Jr. grows several feet tall and is budding. A representative of the Society of Silent Flower Observers of Southern California announces that Seymour will receive a trophy and that she will return to the shop when the plant's buds open. While Seymour and Audrey go on a date, Mushnick stays at the shop to see that Audrey Jr. harms no one else. While tending to his shop, Mushnick finds himself at the mercy of Kloy Haddock, a robber who pretended to be a customer earlier that day. Haddock believes that the huge crowds he observed at the shop indicate the presence of a lot of money. Mushnick tricks Haddock into thinking that the money is where Audrey Jr. is kept. The plant eats Haddock after Mushnick maneuvers him next to it. When forced to damage his relationship with Audrey to keep her from discovering Audrey Jr.'s nature, Seymour confronts the plant, planning to no longer do its bidding. The plant then hypnotizes Seymour and commands him to bring it more food. He wanders the night streets and knocks out a prostitute, whom he takes to Audrey Jr. Lacking clues about the disappearances, Fink and Stoolie attend a sunset celebration at the shop during which Seymour is to be presented with the trophy and Audrey Jr.'s buds are expected to bloom. As the attendees watch, four buds open; inside each flower is the face of one of Audrey Jr.'s victims. Fink and Stoolie realize that Seymour is the murderer. Seymour flees from the shop with the officers in pursuit. He manages to lose them and make his way back to the now-empty shop, where he blames Audrey Jr. for ruining his life. The plant instead asks to be fed. Seymour grabs a kitchen knife and climbs into Audrey Jr.'s maw with the intention of killing it. Later that evening, Audrey Jr. begins to wither and die. One final bloom opens to reveal Seymour's face, who shouts "I didn't mean it!" Before Wilting.

The Love Bug
Jim Douglas, once a prominent race car driver, is now relegated to participating in demolition derbies. Residing in a converted firehouse overlooking San Francisco Bay, Jim lives with his friend Tennessee Steinmetz, an eccentric mechanic and sculptor whose artistic creations repurpose discarded automobile components. Jim’s fortunes shift when he visits a European car dealership, where he encounters Carole Bennett, a mechanic and sales associate, as well as Peter Thorndyke, the British proprietor of the establishment. During this visit, Jim notices a peculiar Volkswagen Beetle —a vehicle Thorndyke openly abuses after it is returned to the showroom under mysterious circumstances. Lacking the financial means to procure a vehicle, Jim departs, only to find that the Beetle follows him home. This leads to a police intervention on charges of grand theft, forcing Jim to reluctantly agree to a lease-purchase arrangement for the car. Initially, Jim is frustrated with the Beetle, whose idiosyncratic behaviour includes avoiding highways and orchestrating encounters with Carole, suspecting Thorndyke of duping him with a malfunctioning vehicle. Tennessee discerns that the car possesses sentience although Jim sceptically dismisses Tennessee's claims. Endearing himself to the Beetle, Tennessee christens the car "Herbie". Jim decides to enter Herbie into racing, giving the car racing stripes and adding the number '53'. In their debut race, Herbie delivers an unexpected victory, much to Thorndyke's surprise and Carole's delight. Thorndyke then offers the clear the payments in exchange to sell Herbie back to him. Jim is forced to compete directly with Thorndyke at Riverside, Herbie scores another impressive victory, overtaking his rival at the finish line. Jim, Tennessee, and Herbie becoming the talk of the California racing circuit, while once-champion Thorndyke suffers increasingly humiliating defeats. Desperate to discover the secret of Herbie's success, Thorndyke, on the eve of another important race, convinces Carole to take Jim for a ride in the best car in the showroom (an Apollo GT), then sneaks into his rival's house, gets Tennessee drunk on his own Irish coffee, and sabotages Herbie's performance in the race by pouring it into Herbie's gas tank. Disillusioned, Jim decides to replace Herbie with a new Lamborghini, a decision that alienates Carole who had just quit her promising job alongside Thorndyke (learning of his sabotage scheme), and Tennessee. Feeling betrayed, Herbie reacts by vandalizing the Lamborghini and fleeing. After narrowly escaping being torn apart in Thorndyke's workshop, his escapades culminate in an attempt to throw himself from the Golden Gate Bridge, prompting Jim to intervene. At the police station, Tang Wu, a racing enthusiast and local businessman whose property Herbie also damaged, agrees to an offer from Jim to drop charges in exchange for ownership of Herbie on condition that Jim and Tennessee may race Herbie in the prestigious El Dorado Road race, with the agreement that if Jim wins the race, Mr. Wu will sell Herbie back to him for one dollar. The El Dorado race, a two-day event traversing the Sierra Nevada, becomes the stage for Thorndyke's underhanded tactics. Despite these obstacles, Jim, Carole, and Tennessee persevere, although the first leg of the race leaves Herbie in a battered state, limping across the finish line using a makeshift wagon wheel. Overnight, Herbie refuses to start, and Jim admits to Mr. Wu that Herbie is in no condition to continue the race. Thorndyke suddenly appears, revealing that he made a separate bet with Mr. Wu that should Herbie drop out of the race, Thorndyke would take possession of Herbie and have him crushed. After Thorndyke assaults Jim, Herbie restarts, chasing Thorndyke away. On the second leg, Herbie overcomes numerous challenges to close the gap on Thorndyke and take the lead heading into the final stages of the race. As they near the finish line, Herbie splits in two due to mechanical strain, his rear half, carrying Tennessee and the engine, crossing the finish line first, while his front half, with Jim and Carole aboard, follows closely, securing both first and third place. Wu assumes control of Thorndyke's dealership, appoints Tennessee as his assistant, and relegates Thorndyke to the mechanics' workshop alongside his accomplice Havershaw. Rebuilt, Herbie serves as the wedding vehicle for Jim and Carole's departure, whisking the newlyweds away on their honeymoon.

The Kremlin Letter
In late 1969, U.S. Naval Intelligence officer Charles Rone is contacted by "The Highwayman", a veteran spy and member of a freelance espionage ring that sells information to the highest bidder. The Highwayman recruits Rone for an intelligence operation, along with Janis, "The Whore", a drug dealer and panderer; "The Warlock", a culturally sophisticated homosexual; and B.A., a thief. The group must retrieve a letter, written without proper authorization, that promises United States aid to the Soviet Union in destroying Chinese atomic weapons plants. The letter was solicited on behalf of a high-level Soviet official by a man named Dmitri Polyakov. Polyakov had previously been selling Soviet secrets to the U.S. that he had obtained from the high-level official. Upon learning about the letter, U.S. and British authorities arranged to buy it back from Polyakov. However, Polyakov later committed suicide after being apprehended by Soviet counterintelligence, under the direction of Colonel Yakov Kosnov. The group blackmails Captain Potkin, the head of Soviet counterintelligence in the U.S., threatening his family to force him to allow them the use of his vacant apartment in Moscow. Once they arrive in the USSR, the terminally ill Highwayman sacrifices his life, attempting to divert the attention of Soviet counterintelligence away from his team. To ascertain the identity of Polyakov's contact, Janis enters a partnership with a brothel operator, who mentions a Chinese agent known as "The Kitai" as a possible source for names of officials and others to whom he can sell heroin, with which Janis already plans to keep the prostitutes addicted. Meanwhile, the Warlock integrates himself into a community of intellectual homosexuals, starting an affair with a university professor. One of the professor's students was Polyakov's former lover. The student says that Polyakov had a relationship with Vladimir Bresnavitch of the Central Committee. Years before, Bresnavitch sought to oust Kosnov from his job, in favor of Robert Sturdevant, a primary operator in The Highwayman's old group. Prior to that time, Kosnov and Sturdevant had been friendly, with each one trusting the other to allow his agents to operate in the other's territory. However, with the pressure from Bresnavitch, Kosnov decided that he had to do "something spectacular" to keep his job. He betrayed Sturdevant's trust and captured his agents, earning the enmity of Sturdevant himself. Sturdevant eventually disappeared and presumably committed suicide. Bresnavitch had used Polyakov to fence stolen art works in Paris, so Ward, an old partner of the Highwayman and a member of Rone's current group, decides to go there in search of leads. On the day of his return, Potkin reaches the Soviet Union and informs Bresnavitch about Rone's operation. Janis, B.A. and Ward are apprehended, while The Warlock commits suicide before being captured. Rone escapes and tries visiting the Kitai to arrange re-purchase of the letter. However, the Kitai responds by trying to kill Rone, who determines that the Chinese have the letter. Rone then turns to Kosnov's wife Erika Beck, with whom he has been having an affair. Rone eventually realizes that Bresnavitch orchestrated the raid without the knowledge of Soviet counterintelligence, an indicator that he was Polyakov's traitorous Soviet official contact. Rone promises to help Erika escape to the West. She later reports that B.A. has taken poison and is expected to die. Rone threatens to expose Bresnavitch unless Ward is released. Bresnavitch agrees, and Rone and Ward then arrange to leave the next day. Disapproving of Rone's plans to aid Erika, Ward kills her. Ward then approaches Kosnov. He begins listing the names of agents betrayed by Kosnov, says that the time has come for retribution and shoots Kosnov in the kneecap. Kosnov then seems to recognize Ward, who closes in on him. Kosnov soon begins screaming. While heading for a plane to leave the country, Rone shares with Ward his conclusions that Ward is actually Sturdevant and intends to stay, having made a deal with Bresnavitch to take over as the head of Soviet counterintelligence. Ward then reveals that B.A. is alive. He offers to release B.A. in exchange for a favor, handing Rone a note that reads, "Kill Potkin's wife and daughters or I kill the girl."
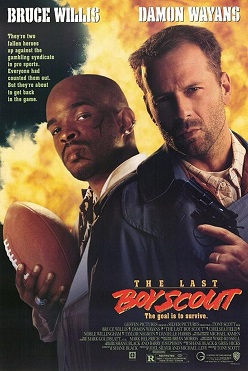
The Last Boy Scout
During halftime at a football game, Los Angeles Stallions running back Billy Cole receives a call from Milo, a man who warns him to win the game or he will be killed. Cole ingests PCP and in a drug-induced rage, carries a gun onto the field, shooting three opposing players to reach the end zone before shooting himself in the head. Meanwhile, private investigator Joe Hallenbeck, a disgraced former Secret Service agent who was once a national hero for saving the President from an assassination attempt, discovers that his wife Sarah is having an affair with his best friend and business partner, Mike Matthews. After a confrontation, Mike gives Joe an assignment to act as bodyguard for a stripper named Cory. Mike is then killed by a car bomb outside Joe's house. That night at a strip club, Joe is approached by Cory's boyfriend, former Stallions quarterback Jimmy Dix, who was banned from the league on gambling charges and alleged drug abuse. While Cory and Jimmy exchange conversations, Joe waits outdoors and is eventually knocked unconscious by a team of hitmen. Jimmy and Cory leave the bar in separate cars while Joe overpowers the hitman left to dispatch him. When Cory is struck from behind and stops to confront the other driver, she is killed by the hitmen. Joe eliminates two of them as the other one retreats and Jimmy is saved. The pair are interrogated by lieutenant Benjamin Bessalo, and he grows dubious of Joe's behavior. Acting on a hunch at Cory's apartment, Jimmy and Joe find a taped phone conversation between Senator Calvin Baynard, who leads a congressional investigation into sports gambling, and Stallions owner Sheldon Marcone. When Joe was in the Secret Service, he witnessed Baynard torturing a woman in a hotel room and assaulted the senator to liberate her. Baynard retaliated by having Joe fired for refusing to cover up the incident. When the tape is ruined in Joe's faulty car stereo, Jimmy realizes that Cory tried using the tape against Marcone to reinstate Jimmy on the team, prompting Marcone to send the hitmen. Joe saves Jimmy from a second car bomb, and tricks two hitmen into blowing themselves up. However, the explosion destroys the remaining evidence. At Joe's house, Jimmy attempts to use cocaine in the bathroom. However, Joe catches Jimmy and kicks him out. As Jimmy leaves, Joe's daughter Darian asks him to sign a football trading card. She states that Joe was a fan of Jimmy's and never watched another game after he was excluded from the league. Learning of Mike's affair with Sarah, the police assume that Joe killed him and move to make an arrest. Milo, Marcone's top henchman, captures Joe first and shoots detective McClusky with Joe's gun. Marcone has been purchasing senate votes to legalize sports gambling, but Baynard tried to blackmail Marcone for $6 million. Aware of Joe's history with Baynard, Marcone explains it would be cheaper to kill the senator and frame Joe for the murder. Joe is taken to a wooded area and forced to hand a briefcase with money to Baynard's bodyguards, and Marcone's men surreptitiously switch it with a briefcase containing a bomb. Joe is rescued by Jimmy and Darian, and acquires both briefcases after running the bodyguards and Milo off the road. However, Milo survives and while Darian is left to wait for the police, she is abducted by Milo. Heading to the stadium to rescue Darian, Joe and Jimmy are captured and escorted to Marcone's office. Jimmy creates a diversion, allowing them to fight their way free. Realizing that Milo plans to shoot Baynard, Joe goes after Milo while sending Jimmy to warn the senator. Grabbing the game ball, Jimmy throws it at Baynard, knocking him down just as Milo starts to open fire. Joe pushes Milo to the edge of the stadium light platform, where SWAT officers shoot him before he falls into the moving rotor blades of a police helicopter. The briefcase of money is recovered and Marcone, having escaped with the rigged briefcase, is killed when he opens it at his estate. The next day, Joe and Sarah reconcile, and Joe and Jimmy decide to become partners.

The Lion King
In the Pride Lands, a pride of lions rules over the kingdom from Pride Rock. King Mufasa and Queen Sarabi 's newborn son, Simba, is presented to the gathered animals by Rafiki, the mandrill who serves as the kingdom's shaman and advisor. Mufasa's younger brother, Scar, covets the throne and plots to eliminate Mufasa and Simba so that he may become king. When Simba grows into a young cub, Mufasa shows him the Pride Lands and forbids him to explore beyond its borders. Mufasa explains to Simba the responsibilities of kingship and the "circle of life," which connects all living things. Scar manipulates Simba into exploring an elephants' graveyard beyond the Pride Lands. There, Simba and his best friend, Nala, are chased by three spotted hyenas named Shenzi, Banzai, and Ed. Mufasa is alerted by his majordomo, the hornbill Zazu, and rescues the cubs. Though disappointed in Simba for disobeying him and endangering himself and Nala, Mufasa forgives him. He explains that the great kings of the past watch over them from the night sky, from which he will one day watch over Simba. Scar visits the hyenas and convinces them to help him kill Mufasa and Simba in exchange for hunting rights in the Pride Lands. Scar lures Simba into a gorge and signals the hyenas to drive a large herd of wildebeest into a stampede to trample him. He then alerts Mufasa, who saves Simba and tries to escape the gorge, but Scar betrays him by throwing him into the stampede to his death. Scar then deceives Simba into believing that Mufasa's death was his fault and tells him to leave the kingdom and never return. He orders the hyenas to kill Simba, but Simba escapes. Unaware of Simba's survival, Scar tells the pride that the stampede killed both Mufasa and Simba, and steps forward as the new king, allowing the hyenas into the Pride Lands. Simba collapses in a desert but is rescued by two outcasts, a meerkat and a warthog named Timon and Pumbaa. Simba grows up with his two new friends in their oasis, living a carefree life under their motto " hakuna matata " ("no worries" in Swahili). Years later, an adult Simba rescues Timon and Pumbaa from a hungry lioness, who is revealed to be Nala. Simba and Nala fall in love, and she urges him to return home, telling him that the Pride Lands have become drought -stricken under Scar's reign. Still feeling guilty over Mufasa's death, Simba refuses and leaves angrily. He encounters Rafiki, who tells Simba that Mufasa's spirit lives on in him. Simba is visited by the spirit of Mufasa in the night sky, who tells him that he must take his place as king. After Rafiki advises him to learn from the past instead of running from it, Simba decides to return to the Pride Lands. Aided by his friends, Simba sneaks past the hyenas at Pride Rock and confronts Scar, who shames Simba over his supposed role in Mufasa's death. Scar then reveals to Simba that he killed Mufasa. Enraged, Simba retaliates and forces Scar to confess the truth to the pride. A battle ensues between Simba and his allies and the hyenas. Scar attempts to escape but is cornered by Simba at a ledge near the top of Pride Rock. Scar begs for mercy and attempts to deceive Simba by blaming his actions on the hyenas. Simba spares Scar's life, but orders him to leave the Pride Lands forever. Scar refuses and attacks Simba. Following a brief battle, Simba throws Scar off the ledge. Scar survives the fall, but the hyenas, who overheard him betraying them, attack and maul him to death. With Scar and the hyenas gone, Simba takes his place as king, and Nala becomes his queen. With the Pride Lands restored, Rafiki presents Simba and Nala's newborn cub to the assembled animals, thus continuing the circle of life.
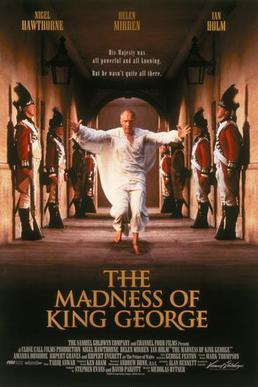
The Madness of King George
King George III's bout of madness in 1788 touched off the Regency Crisis of 1788 and triggered a power struggle between factions of Parliament under the Tory Prime Minister William Pitt the Younger and the reform-minded Leader of the Opposition Charles James Fox. At first, the King's behaviour appears mildly eccentric. He is deeply concerned with the wellbeing and productivity of Great Britain and exhibits an encyclopaedic knowledge of the families of even the most obscure royal appointments. He is devoted to his loving wife, Queen Charlotte, and their large brood of 15 children. However, he is growing more unsettled, partly over the loss of America. His memory fails, his behaviour becomes erratic and hypersexual, he talks and talks, and his urine turns blue. George, Prince of Wales, aggravates the situation, knowing that he will be named regent if the King becomes incapacitated. George chafes under his father's relentless criticism, and yearns for greater freedom, particularly when it comes to choosing a wife. He married the woman everyone believes to be his mistress, Mrs. Fitzherbert, in a secret ceremony in 1785. Without his father's consent, the marriage is illegal. Even with consent, it would remove him from the succession, because Fitzherbert is a Catholic. He knows that he has the moral support of Fox, whose agenda includes abolition of the slave trade and friendlier relations with America. Knowing how to exacerbate the King's behaviour, the Prince arranges a concert of music by Handel. The King reacts as expected, interrupting the musicians, speaking lasciviously to Lady Pembroke, and finally assaulting his son. In a private moment, the King tells Charlotte that he knows something is wrong. They are brutally interrupted when the Prince has them separated, supposedly on the advice of physicians. Led by the Prince of Wales' personal physician, Dr. Warren, the King is treated using the medical practices of the time, which focus on the state of his urine and bowel movements and include painful cupping and purgatives. Lady Pembroke recommends Dr. Francis Willis, who cured her mother-in-law. Willis uses novel procedures. At his farm in Lincolnshire, patients work to gain "a better opinion of themselves." He observes to an equerry "To be curbed, thwarted, stood up to, exercises the character." When the King insults him, foully, he is strapped into a chair and gagged. He will be restrained whenever he "swears and indulges in meaningless discourse" and "does not strive every day and always towards his own recovery". When the Prince has the King transferred to Kew, Charlotte watches as her beloved, bearded and wearing a soiled diaper and a straitjacket, struggles against being put in the coach. "Until you can govern yourself, you're not fit to govern others. And until you do so, I shall govern you," Willis says. At Kew, the King spits soup at Willis, but gains control under the physician's intractable gaze. Later, the King, properly dressed, feeds himself to a round of applause from staff—but the delusions persist. The Whig opposition confronts Pitt's increasingly unpopular Tory government with a proposal that would give the Prince powers of regency. Baron Thurlow, the Lord Chancellor, obtains and suppresses proof of the marriage. Fox wins, and the Regency Bill is printed. Thurlow comes to see the King and joins in a moving reading of King Lear. "I have remembered how to seem..." the King muses. "What, what!" an expression he has not used in six months. His urine is yellow. Thurlow and the King arrive at Parliament in time to thwart the bill. The King forces the Prince to admit his marriage and to put away Fitzherbert. With the crisis averted, all those who have witnessed his suffering are summarily dismissed, including Captain Greville, the King's equerry. Fitzroy, another equerry, observes to the sacked Greville: "To be kind does not commend you to kings." Cheering crowds welcome the royal family to St. Paul's Cathedral. Willis stands by, but the King dismisses him. "We must be a model family," he declares; George wants "something to do." "Smile at the people, wave at them. Let them see that we're happy. That's why we're here." Saluting, Willis disappears into the crowd, where Mrs. Fitzherbert also smiles, wistfully.

The Island of Dr. Moreau
United Nations negotiator Edward Douglas survives a plane crash in the Java Sea. A passing boat rescues him. Aboard, Dr. Montgomery tends to him and promises that Douglas will be taken to Timor. However, when they arrive at Montgomery's destination, "Moreau's Island", he instead advises Douglas to disembark and use the radio there. Douglas and Montgomery go to the Main House, where the former is warned not to wander. According to Montgomery, Moreau fled the United States due to backlash against his experimentation on animals. Douglas is locked in his room by Montgomery, but escapes that night. While exploring, he hears cries and enters a laboratory where he witnesses a human/ llama mutant give birth, with doctors attending to the delivery. Douglas's presence is noticed by a doctor, who turns out to be a human/animal hybrid, and he flees, finding Aissa, a daughter of Moreau's, who leads him to the 'village' of the mutants. There, Moreau is worshipped by the mutants. He keeps the hybrids subjugated by using a remote-controlled electrical implant, surgically placed at birth under their skin. Moreau tells Douglas how he introduced human DNA into animals in search of a higher being, incapable of harm. The existing Beast-Folk are imperfect, but Moreau claims to be close to a "solution". When Moreau discovers that the leopard /human hybrid Lo-Mai has killed a rabbit, he promises that there will be a " trial " the next day. Douglas tries to escape by boat, but stops as it is overrun with humanoid rats. At the outdoor trial, Lo-Mai runs at Moreau but is stopped by the remote-controlled implant. To Moreau's shock, Azazello shoots Lo-Mai dead. His body is cremated publicly. Inspecting the charred remains, the mutant " Hyena - Swine " notices the control implant embedded in Lo-Mai's arm. He then feels for the same implant on his own body and removes it from the bone. Hyena later starts saying "no more pain", wanting to spread the word to all the mutants. In addition to the pain caused by the implant, the animals are controlled through regular drugging to prevent them from "retrogressing". Hyena-Swine reveals his removed implant to Montgomery who sets the other beasts after him. Meanwhile, Douglas tries to contact the outside world, but Montgomery sabotages the radio. Hyena-Swine and his trackers—now on his side and also free of implants—confront Moreau. Enraged, Hyena-Swine reveals his intent to overthrow him and destroy all humanity. The group eventually kills Moreau. Douglas then fires a gunshot, scaring the group off. Azazello steals Montgomery's handgun and joins Hyena-Swine's faction. Douglas realizes that Aissa is regressing: her pupils are cat -like, her canine teeth are becoming fangs, and her fingernails are becoming sharper. Douglas can stop this with a serum from the lab. However, Montgomery has gone insane and destroyed it. Moreau was planning to use Douglas's DNA to stop Aissa's regression permanently, completing his experiments. Azazello leads the mutants to the armory. They eventually take over the island, keeping hostages. Montgomery has lost his mind and is promoting hedonism amongst the mutants. Drunk, he sits in Moreau's former throne and is killed by Azazello while watching a mutant orgy. Hyena-Swine's group continues to rampage around the island. Azazello hangs Aissa out of jealousy before being executed by Hyena-Swine, being viewed as a threat to his dominance. Douglas survives by telling Hyena-Swine to impose his leadership and be "God Number One" among the others of his faction, causing Hyena-Swine to kill his supporters. Eventually, M'Ling, another one of Moreau's sons, triggers an explosion that causes Hyena-Swine to lose his gun and allows Douglas to escape. Outnumbered and defenseless, Hyena-Swine retreats into the burning building and dies. Peaceful-minded mutants see off Douglas, who leaves on a raft. The hybrids now want to return to their natural state of being and are in favor of ending Moreau's work.

The Jackal
A joint operation between the FBI and the MVD in Moscow leads to the demise of the younger brother of Azerbaijani mafia boss Terek Murad. Intending to retaliate, Murad hires an ex- KGB asset, an international hitman operating under the codename "The Jackal ", to assassinate an unidentified prominent American for $70 million. Two weeks later, the MVD capture and interrogate one of Murad's henchmen, Viktor Politovsky, and discover the assassination plot. The interrogation, coupled with recovered documents, leads the FBI and MVD to suspect that FBI Director Donald Brown is the intended target. Using a series of disguises and stolen or forged IDs, the Jackal prepares for the assassination attempt. FBI Deputy Director Carter Preston and Russian Police Major Valentina Koslova turn to imprisoned IRA sniper Declan Mulqueen for help. They believe that his former lover, a former ETA militant and fugitive named Isabella Zancona, can identify the Jackal. Mulqueen reveals that he also knows the Jackal and his methods and agrees to help in exchange for his release as well as U.S. citizenship and safe haven for Zancona. Mulqueen and Zancona want revenge on the Jackal after he wounded her in Libya, causing her to miscarry their unborn child. Zancona, now married, provides information to help identify the Jackal, including that he is a United States Army Special Forces veteran with combat experience from his stationing in El Salvador and describes him as sociopathic with no emotions. Zancona discreetly slips Mulqueen a key to a dropbox containing a clean passport and $10,000 cash to return to Ireland. However, Preston had earlier threatened Mulqueen that if he escaped, if he refused to cooperate, or if an IRA squad tried to rescue him, he would be shot. Meanwhile, when the Jackal arrives in Montreal to collect a large caliber weapon, a contact notifies him that hijackers are pursuing it. The Jackal kills one hijacker with an extremely poisonous chemical and evades the others. He then hires Ian Lamont, a mechanic and small-time hoodlum, to build a control mount for the weapon. The Jackal demands that all design specs be turned over to him, and he also requires Lamont's complete confidentiality. When Lamont, underestimating the threat represented by this assassin, tries extorting more money, the Jackal kills him during a live-fire test of the weapon. The FBI discovers Lamont's remains and evidence that the Jackal intends to use a long-range heavy machine gun for the assassination. The Jackal sails across the Great Lakes to Chicago, where he evades the FBI and almost kills Mulqueen, leading Mulqueen to deduce there is a mole tipping off the Jackal. They discover that the director of the Russian Embassy in Washington, D.C., gave the Jackal a direct access code to FBI records, allowing him to track down and kill Koslova and two FBI agents. Before dying, Koslova – passing on a taunt from the Jackal – tells Mulqueen that " cannot protect his women". As the Jackal drives to Washington, D.C., Mulqueen deduces from the Jackal's mocking statement that his target is not Director Brown, but in fact the First Lady of the United States, who is scheduled to give a public speech. The Jackal, masquerading as a gay man, dates Douglas, a man he encountered earlier in a bar; unbeknownst to Douglas, he uses his garage to store his weapon. When a news report exposes the Jackal's identity, he kills Douglas. On the date of the First Lady's speech, the weapon is hidden in a minivan parked near the speaker podium, with the Jackal planning to shoot the First Lady via remote control. However, before the Jackal can take his shot, Mulqueen uses a marksman's rifle to destroy the weapon's scope and takes off in pursuit of the Jackal, while the sniper accompanying Mulqueen blows up the van's fuel tank. The Jackal blindly opens fire before his vehicle is destroyed, causing Preston to be shot and wounded while tackling the First Lady to safety. Following a chase through the Washington Metro tunnels, Mulqueen confronts the Jackal, who is then shot from behind by Zancona; however, the Jackal's gun discharges a shot, and Mulqueen is also wounded. While Zancona tends to Mulqueen, the Jackal, though severely wounded, has survived: he tries to retrieve a spare weapon. Seeing this, Mulqueen grabs Zancona's pistol and shoots the assassin several times, finally killing him. A few days later, Preston and Mulqueen witness the Jackal's burial in an unmarked grave. Preston reveals that he is returning to Russia to pursue Terek Murad and his gang, and that Mulqueen's request to be released was denied but he will likely be moved to a minimum security prison. Preston also remarks that his heroics in saving the First Lady have made him "untouchable" within the FBI: knowing his current clout will prevent any backlash against him, he turns his back on Mulqueen, allowing him to go free.
The Interview
Edward Rodney Fleming (Weaving) is a man living alone after losing his job and wife. One morning, Detective Sergeant John Steele (Martin) and his subordinate, Detective Wayne Prior (Aaron Jeffery), break into Fleming's apartment. They rough Fleming up, ransack his belongings, and take him to the police station in handcuffs. Steele and Prior question Fleming in an interrogation room. The police claim a witness saw Fleming with Andrew Beecroft, the owner of a stolen car. They also claim Fleming's handwriting matches the writing on some forged sales correspondence between Beecroft and a fake buyer, and that the fake buyer's alias matches an alias Fleming used as a teenager to steal a car for a joyride. Fleming denies any knowledge of the theft and only meekly asks for food, as he has not eaten since the previous day. Steele offers false expressions of empathy, while Prior intimidates Fleming when the recorder is off. In between questioning, Detective Inspector Jackson orders Steele to deal with an intrusive reporter, Barry Walls. Steele complains to Walls about how his reckless reporting has previously interfered with police work. Walls shares that he overheard Prior questioning Steele's skills behind his back, to convince Steele he can be useful in return for information. Steele confronts Prior in private, pins him to the wall, and warns him against future disloyalty. As the interrogation proceeds, Steele reveals to Fleming that the car's owner is missing. Fleming correctly guesses he is suspected of murdering the car's owner, and that the police believe the theft is related to other missing persons cases reported in the news. Fleming asks for a lawyer. While Fleming's lawyer advises him to say nothing until he is released in a few hours, Steele convinces Jackson to give him more time with the Fleming. Fleming's demeanour grows in confidence. Despite his lawyer's advice, he expresses his belief that the missing persons were murdered, and mocks the police for chasing some kind of overarching motive. Fleming hints that he might have more to share after eating. When Steele finally provides food, Fleming proudly details how Beecroft picked him up while hitchhiking. He decided to kill Beecroft on a whim. He bludgeoned Beecroft after they drank together, and then he took Beecroft's car and wallet after disposing of the body. Fleming also casually admits to killing five or six other victims starting from a few years ago, claiming he cannot be bothered to remember the details although he always beat them to death after hitchhiking with them. Fleming agrees to provide a video-recorded confession as well. However, during the videotaping, Jackson walks in and asks to speak to Fleming. Fleming immediately recants everything and says he only told Steele and Prior what they wanted to hear because they brutalized him, threatened him, and refused to feed him. Jackson forces Steele and Prior to end the questioning. Later, Steele is informed that the entire day's interrogation was being filmed without his knowledge, due to an investigation by a police ethics committee after too many suspects made formal complaints about his conduct. The officer in charge of the ethics review, Detective Hudson, determines that Steele's entire interview is inadmissible in court due to suggestions, false promises, intimidation, and other questionable techniques by Steele and Prior. Steele blames Jackson for ruining the interview and failing to stand up for him, although Jackson offers to testify that Steele tried to reel in Prior's aggression. Convinced of Fleming's guilt and outraged that he will walk free, Steele arranges to secretly give the entire case info and the audio recording of the confession to Walls. Steele tells Walls he does not care about the consequences since he believes he will be fired anyway. Afterwards, Hudson interviews Steele using another audio recorder. Steele accuses Hudson of a personal grudge, as Hudson led previous ethics investigations against him, too. Hudson turns off the recorder, angrily insults Steele, and tells him he will make sure he is fired. Unbeknownst to Hudson, Steele had his own recorder running and recorded Hudson's abusive comments. Steele is last seen planning how to use his recording of Hudson to defend himself. Fleming leaves the station with an ambiguous grin. In the final scene, he is shown hitchhiking again.
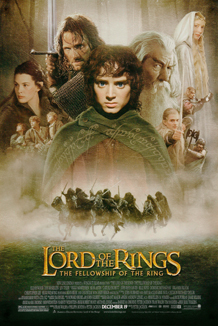
The Lord of the Rings: The Fellowship of the Ring
In the Second Age of Middle-earth, the lords of Elves, Dwarves, and Men each receive Rings of Power. Unbeknownst to them, the Dark Lord Sauron forges the One Ring in Mount Doom, imbuing it with his power to control the other Rings and conquer Middle-earth. A final alliance of Men and Elves battles Sauron's forces in Mordor. Isildur of Gondor severs Sauron's finger, vanquishing him and returning him to spirit form, marking the beginning of the Third Age. The Ring corrupts Isildur, who takes it and is later killed by Orcs. The Ring is lost in a river for 2,500 years until it is found by Gollum, who possesses it for five centuries, until it abandons him and is found by a hobbit named Bilbo Baggins. Sixty years later, Bilbo celebrates his 111th birthday in the Shire with his old friend, Gandalf the Grey. He leaves the Shire for one last adventure, passing on his inheritance, including the Ring, to his nephew Frodo. Gandalf investigates the Ring, learns its true nature, and discovers that Gollum was captured by Sauron and revealed two words during interrogation: "Shire" and "Baggins." Gandalf warns Frodo to leave the Shire. As Frodo departs with his gardener friend, Samwise Gamgee, Gandalf heads to Isengard to seek counsel from his friend, the powerful wizard Saruman. Saruman reveals Sauron has dispatched his nine Nazgûl servants to retrieve the Ring. Gandalf immediately attempts to flee to warn Frodo, but is imprisoned by Saruman who has allied himself with Sauron, communicating with him via a palantír. Frodo and Sam join up with fellow hobbits Merry and Pippin and evade the Nazgûl before reaching Bree to meet Gandalf, who never arrives as Saruman captures him. A Ranger named Strider helps them get to Rivendell but they are ambushed on Weathertop by the Nazgûl, who wound Frodo with a Morgul blade. Arwen, Strider's beloved Elf, finds them, rescues Frodo, and takes him to Rivendell to be healed and reunite with Gandalf, who had escaped Isengard on a Great Eagle. That night, Arwen declares to Strider she is willing to sacrifice her immortality for their love. Learning of Saruman's betrayal from Gandalf and that they are now facing threats from both Sauron and Saruman, Arwen's father Lord Elrond holds a council of Elves, Men, and Dwarves, also attended by Frodo and Gandalf, that decides the Ring must be destroyed. However, Elrond explains that it can only be destroyed in the fires of Mount Doom, the volcano where it was forged. Frodo volunteers to take the Ring, accompanied by Gandalf, Sam, Merry, Pippin, the Elf Legolas, Gimli, Boromir of Gondor, and Strider—who is actually Aragorn, Isildur's heir and the rightful King of Gondor. Bilbo, now living in Rivendell, gives Frodo his old sword Sting, and a chainmail shirt made of mithril. The Fellowship of the Ring is forced to travel through the Mines of Moria due to a storm summoned by Saruman. Gandalf warns Frodo that Gollum, released from Sauron's fortress, has been trailing them with the intention to reclaim the Ring. They find the Dwarves of Moria dead and are attacked by Orcs and a troll. While they hold off the attack, they are pursued by Durin's Bane, a Balrog. The others escape as Gandalf confronts the Balrog and falls into a deep chasm while battling it. The devastated Fellowship reaches Lothlórien, where Galadriel, the Elf-queen, tells Frodo that he alone can complete the quest and warns that one of his companions will try to take the Ring. She shows him a vision of Sauron enslaving Middle-earth should he fail. Meanwhile, Saruman creates an army of Uruk-hai in Isengard to destroy the Fellowship, intending to betray Sauron and claim the Ring for himself. The Fellowship travels to Parth Galen by river. As warned by Galadriel, Frodo is confronted privately by Boromir, who attempts to take the Ring. Uruk-hai scouts ambush the group; their leader, Lurtz, mortally wounds Boromir as he fails to stop them from capturing Merry and Pippin. Aragorn arrives and kills Lurtz, comforting Boromir in his final moments, promising to aid Gondor in their conflict. Worried the Ring will corrupt his friends, Frodo decides to go to Mordor alone, but Sam insists on accompanying him, honouring Gandalf's promise to protect him. Aragorn, Legolas, and Gimli plan to rescue Merry and Pippin, while Frodo and Sam navigate the pass of Emyn Muil towards Mordor.

The Insider
CBS producer Lowell Bergman convinces the founder of Hezbollah, Sheikh Fadlallah, to grant an interview to Mike Wallace for 60 Minutes. Wallace and Bergman firmly stand their ground against the Sheikh's armed and hostile bodyguards, who attempt to intimidate and disrupt their interview preparations. Later, Bergman approaches Jeffrey Wigand—a former executive at the Brown & Williamson tobacco company—for help explaining technical documents. Wigand agrees but intrigues Bergman when he insists that he will not discuss anything else, citing a confidentiality agreement. Brown & Williamson coerces Wigand into a more restrictive agreement, leading Wigand to accuse Bergman of betraying him. Bergman subsequently visits Wigand to defend himself and investigate the potential story. Although Wigand apparently possesses very damaging information, he hesitates to reveal anything, fearing that it will jeopardize his severance package from Brown & Williamson. Wigand's family moves into a more modest house, and Wigand begins working as a teacher. One night, Wigand finds evidence of trespass and receives a sinister phone call. Meanwhile, Bergman contacts Richard Scruggs, an attorney representing Mississippi in a lawsuit against the tobacco industry. Bergman suggests that if they depose Wigand, making his information public, it can give CBS cover to broadcast the information; Scruggs expresses interest. Wigand receives an emailed death threat and finds a bullet in his mailbox. He contacts the FBI, but the agents who visit him are hostile and confiscate his computer. Furious, Wigand demands that Bergman arrange an interview, during which Wigand states that he was fired after objecting to Brown & Williamson intentionally making their cigarettes more addictive. Bergman arranges a security detail for Wigand's home, and the Wigands experience marital stress. Wigand testifies in Mississippi, despite attempts of intimidation and legal suppression by Brown & Williamson attorneys. After returning home, he discovers that his wife Liane has left him and taken their daughters. Eric Kluster, the president of CBS News, decides not to broadcast Wigand's interview after CBS legal counsel Helen Caperelli warns that the network is at risk of legal action from Brown & Williamson. Bergman confronts Kluster, accusing him of sacrificing journalistic integrity to protect the impending sale of CBS to Westinghouse, which would enrich both Kluster and Caperelli. Wallace and their executive producer Don Hewitt both side with Kluster. Wigand, learning of this, is appalled and terminates contact with Bergman. Investigators probe Wigand's personal history and publish their findings in a 500-page dossier. Bergman learns that The Wall Street Journal intends to use it in a piece questioning Wigand's credibility. He convinces the Journal 's editor to delay publication and assign journalists to investigate the dossier, claiming that it falsely quotes its sources. After infighting at CBS over the Wigand segment, Bergman is ordered to take a "vacation" as the abridged 60 Minutes segment airs. Bergman contacts Wigand, who is both dejected and furious, accusing Bergman of manipulating him. Bergman defends himself and praises Wigand and his testimony. Scruggs urges Bergman to air the full segment to draw public support for their lawsuit, which is under threat from a lawsuit by Mississippi's governor. Bergman, frozen out, is unable to assist and privately questions his own motives pursuing the story. Bergman contacts an editor at The New York Times, disclosing the full story and events at CBS. The Times prints the story on the front page and condemns CBS in a scathing editorial. The Journal dismisses the dossier as character assassination and prints Wigand's deposition. Hewitt accuses Bergman of betraying CBS, but finds that Wallace now agrees that bowing to corporate pressure was a mistake. 60 Minutes finally airs the original segment, including the full interview with Wigand. Bergman tells Wallace that he has resigned, believing that 60 Minutes 's credibility and integrity are now permanently tarnished.